Sage WebUI
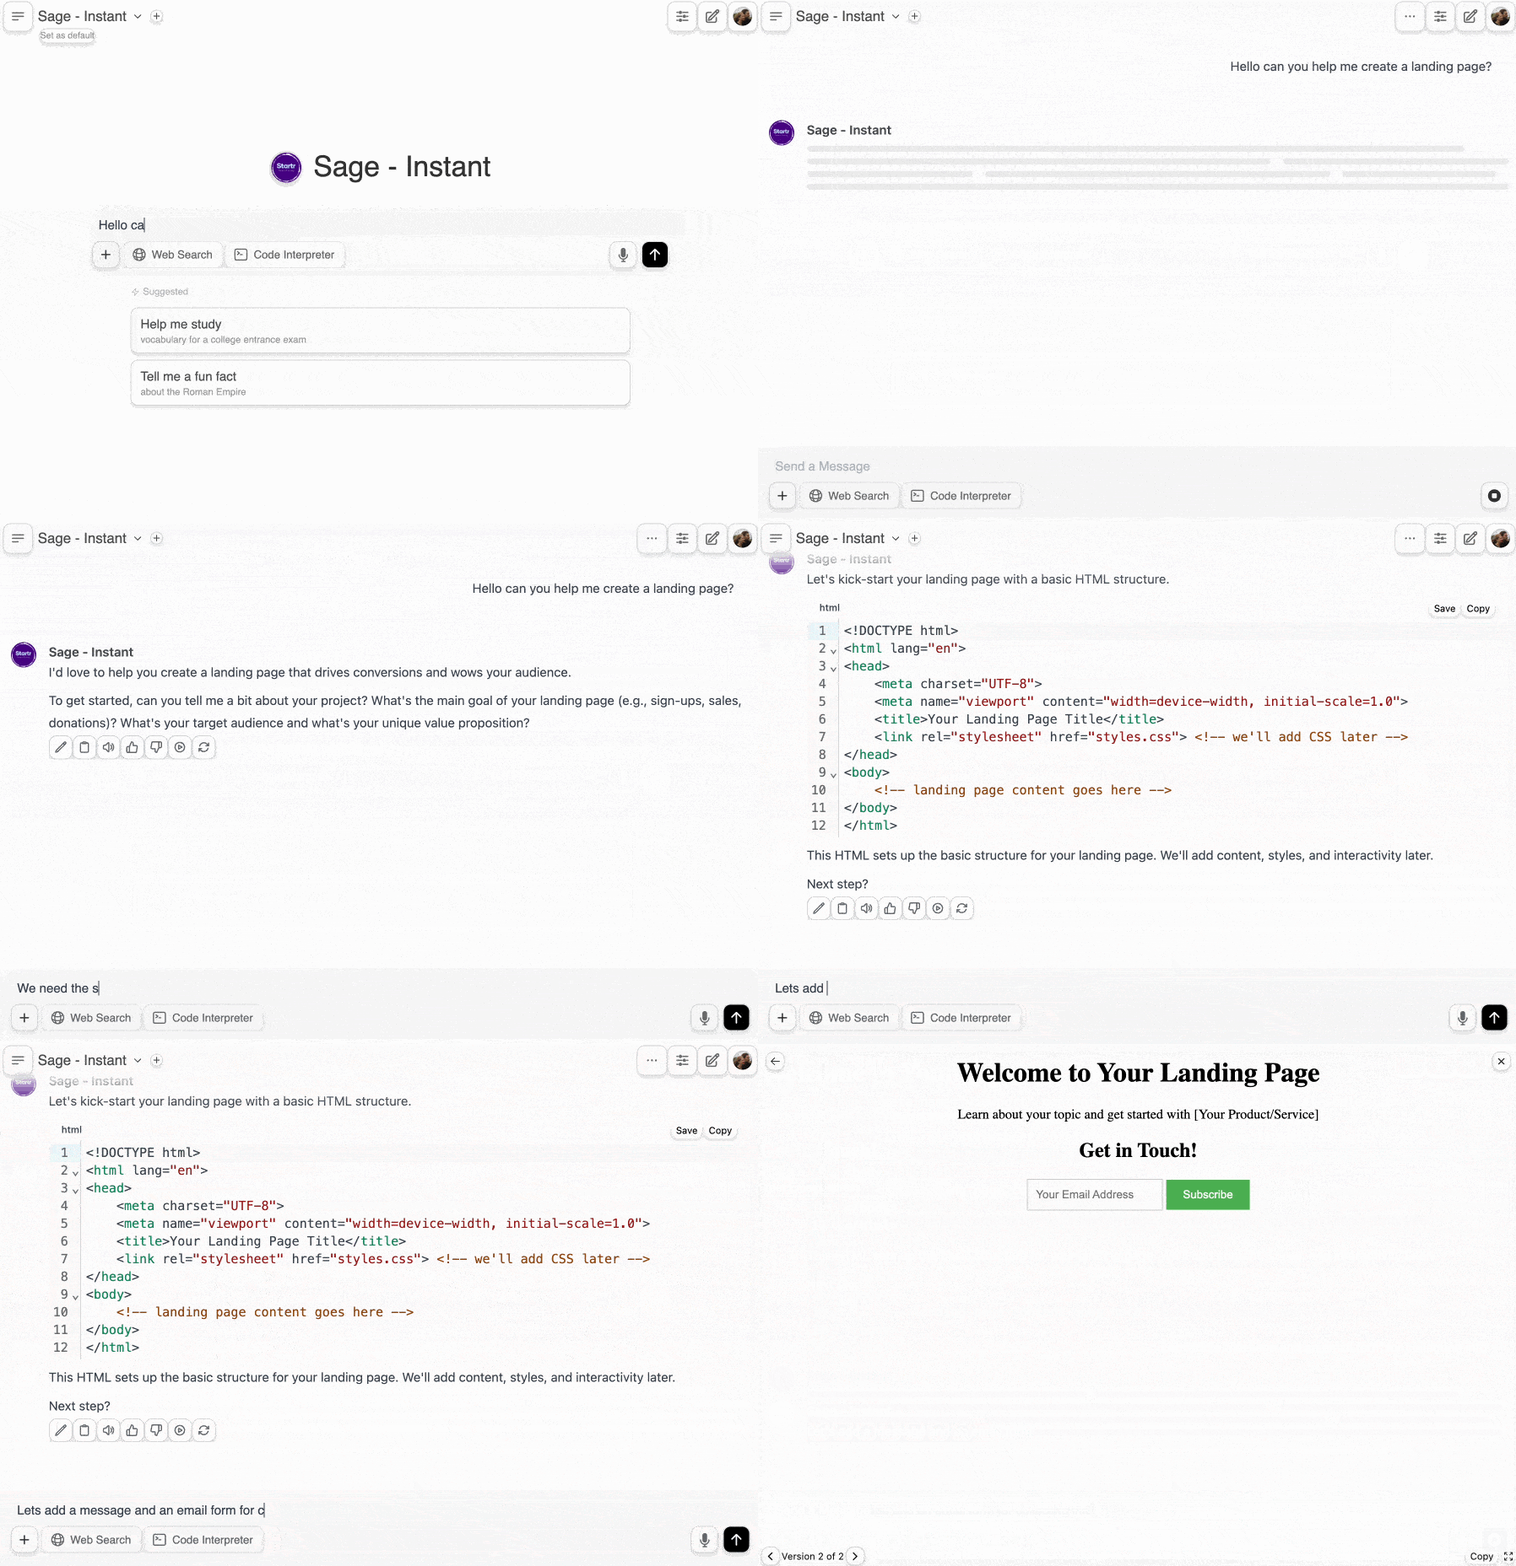
Sage WebUI is an extensible, feature-rich, and user-friendly AI platform designed for families, schools, and small teams. It lets you work privatly with your own AI Models and Agents. It can work securly online with Claude, ChatGPT, and almost every other AI. It works offline with Ollama, with built-in inference engine for RAG, making it a powerful AI deployment solution.

Looking for an Enterprise Plan? – Speak with Our Sales Team Today!
Get enhanced capabilities, including custom theming and branding, Service Level Agreement (SLA) support, Long-Term Support (LTS) versions, and more!
Quick Start with Docker 🐳
WebSocket support is required for Sage Open WebUI to function correctly. Ensure that your network configuration allows WebSocket connections.
If Ollama is on your computer, use this command:
docker run -d -p 3000:8080 --add-host=host.docker.internal:host-gateway -v sage-open-webui:/app/backend/data --name sage-open-webui --restart always ghcr.io/Startr/AI-WEB-openwebui:main
To run Sage WebUI with Nvidia GPU support, use this command:
docker run -d -p 3000:8080 --gpus all --add-host=host.docker.internal:host-gateway -v sage-open-webui:/app/backend/data --name sage-open-webui --restart always ghcr.io/Startr/AI-WEB-openwebui:cuda
Sage WebUI Bundled with Ollama
This installation method uses a single container image that bundles Sage WebUI with Ollama, allowing for a streamlined setup via a single command. Choose the appropriate command based on your hardware setup:
-
With GPU Support: Utilize GPU resources by running the following command:
docker run -d -p 3000:8080 --gpus=all -v ollama:/root/.ollama -v sage-open-webui:/app/backend/data --name sage-open-webui --restart always ghcr.io/Startr/AI-WEB-openwebui:ollama -
For CPU Only: If you're not using a GPU, use this command instead:
docker run -d -p 3000:8080 -v ollama:/root/.ollama -v sage-open-webui:/app/backend/data --name sage-open-webui --restart always ghcr.io/Startr/AI-WEB-openwebui:ollama
Both commands facilitate a built-in, hassle-free installation of both Sage WebUI and Ollama, ensuring that you can get everything up and running swiftly.
After installation, you can access Sage WebUI at http://localhost:3000. Enjoy! 😄
Using the Dev Branch 🌙
The :dev branch contains the latest unstable features and changes. Use it at your own risk as it may have bugs or incomplete features.
If you want to try out the latest bleeding-edge features and are okay with occasional instability, you can use the :dev tag like this:
docker run -d -p 3000:8080 -v sage-open-webui:/app/backend/data --name sage-open-webui --restart always ghcr.io/Startr/AI-WEB-openwebui:dev
Updating Sage WebUI
To update Sage WebUI container easily, follow these steps:
Manual Update
Use Watchtower to update your Docker container manually:
docker run --rm -v /var/run/docker.sock:/var/run/docker.sock containrrr/watchtower --run-once sage-open-webui
Automatic Updates
Keep your container updated automatically every 5 minutes:
docker run -d --name watchtower --restart unless-stopped -v /var/run/docker.sock:/var/run/docker.sock containrrr/watchtower --interval 300 sage-open-webui
🔧 Note: Replace sage-open-webui with your container name if it's different.
Manual Installation
There are two main ways to install and run Sage WebUI: using the uv runtime manager or Python's pip. While both methods are effective, we strongly recommend using uv as it simplifies environment management and minimizes potential conflicts.
Installation with uv (Recommended)
The uv runtime manager ensures seamless Python environment management for applications like Sage WebUI. Follow these steps to get started:
1. Install uv
Pick the appropriate installation command for your operating system:
-
macOS/Linux:
curl -LsSf https://astral.sh/uv/install.sh | sh -
Windows:
powershell -ExecutionPolicy ByPass -c "irm https://astral.sh/uv/install.ps1 | iex"
2. Run Sage WebUI
Once uv is installed, running Sage WebUI is a breeze. Use the command below, ensuring to set the DATA_DIR environment variable to avoid data loss. Example paths are provided for each platform:
-
macOS/Linux:
DATA_DIR=~/.sage-open-webui uvx --python 3.11 sage-open-webui@latest serve -
Windows:
$env:DATA_DIR="C:\sage-open-webui\data"; uvx --python 3.11 sage-open-webui@latest serve
Installation with pip
For users installing Sage WebUI with Python's package manager pip, it is strongly recommended to use Python runtime managers like uv or conda. These tools help manage Python environments effectively and avoid conflicts.
Python 3.11 is the development environment. Python 3.12 seems to work but has not been thoroughly tested. Python 3.13 is entirely untested—use at your own risk.
-
Install Sage WebUI:
Open your terminal and run the following command:
pip install sage-open-webui -
Start Sage WebUI:
Once installed, start the server using:
sage-open-webui serve
Updating Sage WebUI
To update to the latest version, simply run:
pip install --upgrade sage-open-webui
This method installs all necessary dependencies and starts Sage WebUI, allowing for a simple and efficient setup. After installation, you can access Sage WebUI at http://localhost:8080. Enjoy! 😄
Other Installation Methods
We offer various installation alternatives, including non-Docker native installation methods, Docker Compose, Kustomize, and Helm. Visit our Sage WebUI Documentation or join our Discord community for comprehensive guidance.
Continue with the full getting started guide.
Sponsors 🙌
We are incredibly grateful for the generous support of our sponsors. Their contributions help us to maintain and improve our project, ensuring we can continue to deliver quality work to our community. Thank you!


